Vue.js에서 Props를 이용한 하위 컴포넌트에게 데이터 전송

props는 properties 의 줄임말로 상위 컴포넌트가 하위 컴포넌트에게 데이터를 전달해줘야 할 때 props를 사용한다.
단방향 데이터 흐름을 가지며, 하위 컴포넌트는 상위 컴포넌트의 데이터를 수정할 수 없다. 번외로 상위 컴포넌트에게 데이터 전송이나 상위 컴포넌트의 데이터를 수정하려면 Custom Events라는 기능을 이용하여 요청할 수 있다. 이번시간에는 Props를 이용한 하위 컴포넌트에게 데이터 전송하는 사용방법에 대해 알아보자.
- 샘플 프로젝트 생성
> vue create props-test
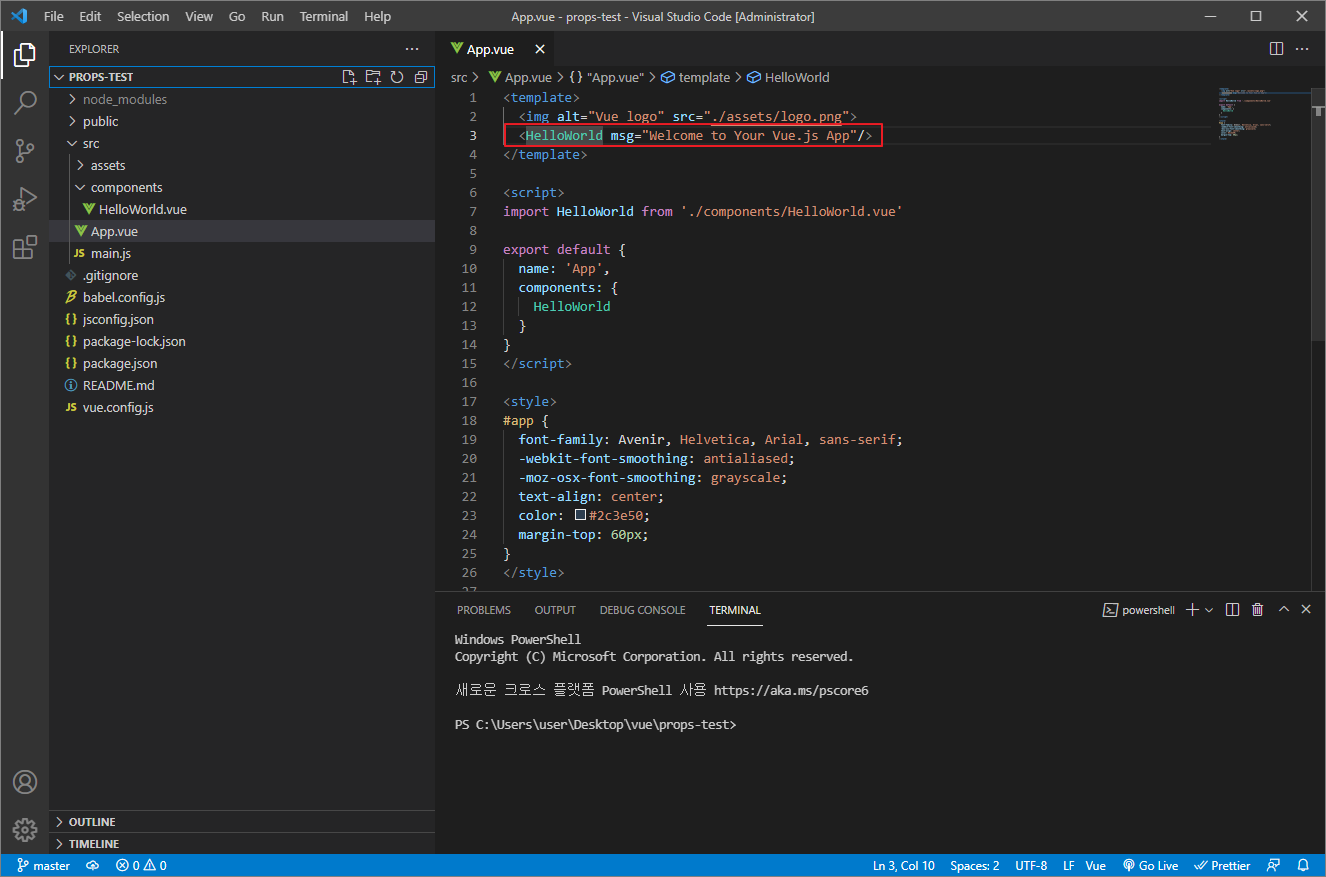
샘플 프로젝트를 생성하면 App.vue는 상위(부모) 컴포넌트로서 하위(자식) 컴포넌트인 HelloWorld를 쓰고 있다. 샘플 프로젝트의 소스를 보면 App.vue로부터 HelloWorld.vue로 이미 이름이 msg인 String 값을 Props를 이용하여 전송하고 있는 것을 확인할 수 있다.
- 데이터 전송
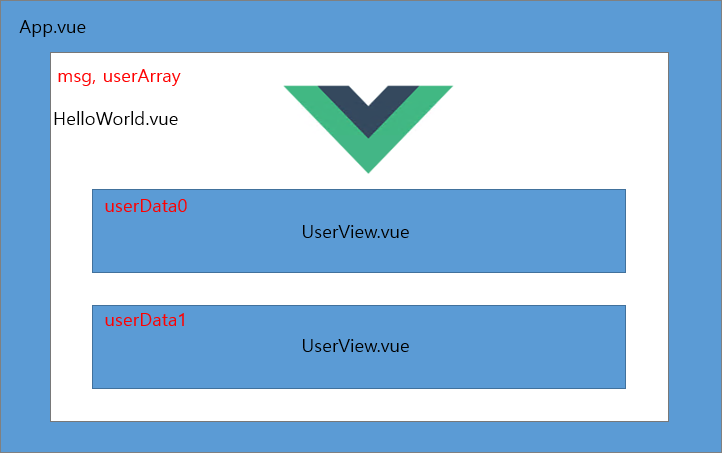
최상위 컴포넌트인 App.vue는 그 하위 컴포넌트인 HelloWorld.vue에 msg와 userArray 데이터를 props를 이용하여 전송한다. HelloWorld.vue 컴포넌트는 msg 데이터를 출력하고 userArray 개수만큼 그 하위 컴포넌트인 UserView.vue 컴포넌트를 생성하고 userData정보를 전송한다. userView.vue 컴포넌트는 userData 정보를 받아 출력한다.
- Props를 이용하여 전송할 사용자 정보 목록
[
    {
      userId: 1,
      id: 1,
      title: "laboriosam mollitia et enim quasi adipisci quia provident illum",
      completed: false,
      class: 'user-info',
      color: 'red'
    },
    {
      userId: 1,
      id: 2,
      title: "quis ut nam facilis et officia qui",
      completed: false,
      class: 'user-info',
      color: 'blue'
    },
],
- App.vue
하위 컴포넌트로 데이터 전송 시 일반 텍스트는 이름="일반 텍스트", 변수 데이터는 :이름="변수 이름" 형태를 가진다.
<template>
  <div>
    <HelloWorld msg="Welcome to Your Vue.js App" :userArray="userArray" />
  </div>
</template>

<script>
import HelloWorld from "./components/HelloWorld.vue";

export default {
  name: "App",
  data() {
    return {
      userArray: [
        {
          userId: 1,
          id: 1,
          title: "laboriosam mollitia et enim quasi adipisci quia provident illum",
          completed: false,
          class: 'user-info',
          color: 'red'
        },
        {
          userId: 1,
          id: 2,
          title: "quis ut nam facilis et officia qui",
          completed: false,
          class: 'user-info',
          color: 'blue'
        },
      ],
    };
  },
  components: {
    HelloWorld,
  },
};
</script>

<style>
#app {
  font-family: Avenir, Helvetica, Arial, sans-serif;
  -webkit-font-smoothing: antialiased;
  -moz-osx-font-smoothing: grayscale;
  text-align: center;
  color: #2c3e50;
  margin-top: 60px;
}
</style>
- HelloWorld.vue
하위컴포넌트에서 script단에 받아온 props(변수명과 변수타입을 지정) 데이터를 선언해주어야 한다. For문을 이용하여 UserView 컴포넌트 각각 userData 정보를 전송한다.
<template>
  <div>
    <img alt="Vue logo" src=".././assets/logo.png" />
    <div class="hello">
      <h1>{{ msg }}</h1>
      <UserView :userData="userArray[i]" v-for="(a, i) in userArray" :key="i" />
    </div>
  </div>
</template>

<script>
import UserView from "./UserView.vue";

export default {
  name: "HelloWorld",
  props: {
    msg: String,
    userArray: Array,
  },
  components: {
    UserView,
  },
};
</script>
<style></style>
- UserView.vue
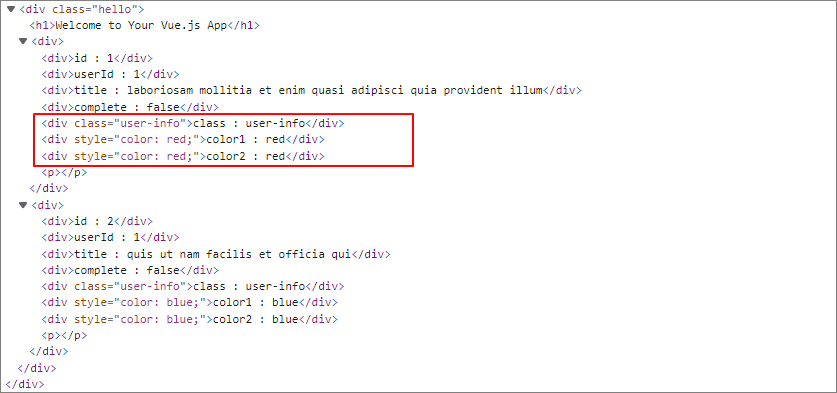
HelloWorld.vue 컴포넌트로부터 받아온 userData 정보를 출력한다. props를 이용하면 아래와 같은 방법으로 HTML 태그의 attribute의 값도 바인딩할 수 있다.
<template>
  <div>
    <div>id : {{ userData.id }}</div>
    <div>userId : {{ userData.userId }}</div>
    <div>title : {{ userData.title }}</div>
    <div>complete : {{ userData.completed }}</div>
    <div :class="userData.class">class : {{ userData.class }}</div>
    <div :style="{ color: userData.color }">color1 : {{ userData.color }}</div>
    <div :style="`color:${userData.color}`">color2 : {{ userData.color }}</div>
    <p></p>
  </div>
</template>

<script>
export default {
  name: "UserView",
  props: {
    userData: Object,
  },
};
</script>

<style></style>
- Props를 이용한 데이터 출력 화면

- Props로 데이터를 보내는 여러가지 방법
<UserView 이름="안녕하세요 텍스트 입니다." />
<UserView :이름="100" />
<UserView :이름="[1,2,3]" />
<UserView :이름="{ age:30 }" />
'Programming > Vue.js' 카테고리의 다른 글
| Vue.js에서 Props 대신 Slot! 하위 컴포넌트에게 데이터 전송 (0) | 2022.12.20 |
|---|---|
| Vue.js에서 Custom Events를 이용한 상위 컴포넌트의 데이터 변경 (0) | 2022.12.15 |
| Vue.js에서 Axios를 이용한 비동기 통신 (1) | 2022.12.06 |
| Vue.js에 Bootstrap 설치 및 사용하기 (0) | 2022.11.25 |
| vue-router redirect 404 NotFound 에러페이지 (1) | 2022.11.10 |


댓글